Agents
IssuePit supports AI agents that can be automatically assigned to issues and execute tasks inside containers. This page explains how to create and configure agent modes.
Terminology
IssuePit distinguishes between two related concepts:
| Term | Definition |
|---|---|
| Agent mode | A configuration that defines a system prompt, MCP tools, authentication keys, and other settings. This is what you create and manage in the IssuePit UI. |
| (Work) agent | The actual CLI tool or process (e.g. opencode, codex, GitHub Copilot CLI) that performs the work. It is launched with an agent mode configuration. |
In short: an agent mode is executed by a work agent. Multiple agent modes can be run by multiple work agents in parallel.
Work agents are spawned by
IssuePit.ExecutionClientwith the agent mode configuration on demand whenever there is work to be done.
What is an Agent Mode?
An agent mode is a configuration that:
- Has a system prompt defining the role and behavior
- Optionally uses MCP (Model Context Protocol) servers for additional tools
- References authentication API keys for AI providers and external services
- Can be assigned to issues in the Plan, Code, or Evaluate queues
When an issue is assigned to an agent mode, IssuePit.ExecutionClient spawns a work agent (e.g. inside a Docker/Podman container) and passes it the agent mode configuration.
Creating an Agent Mode
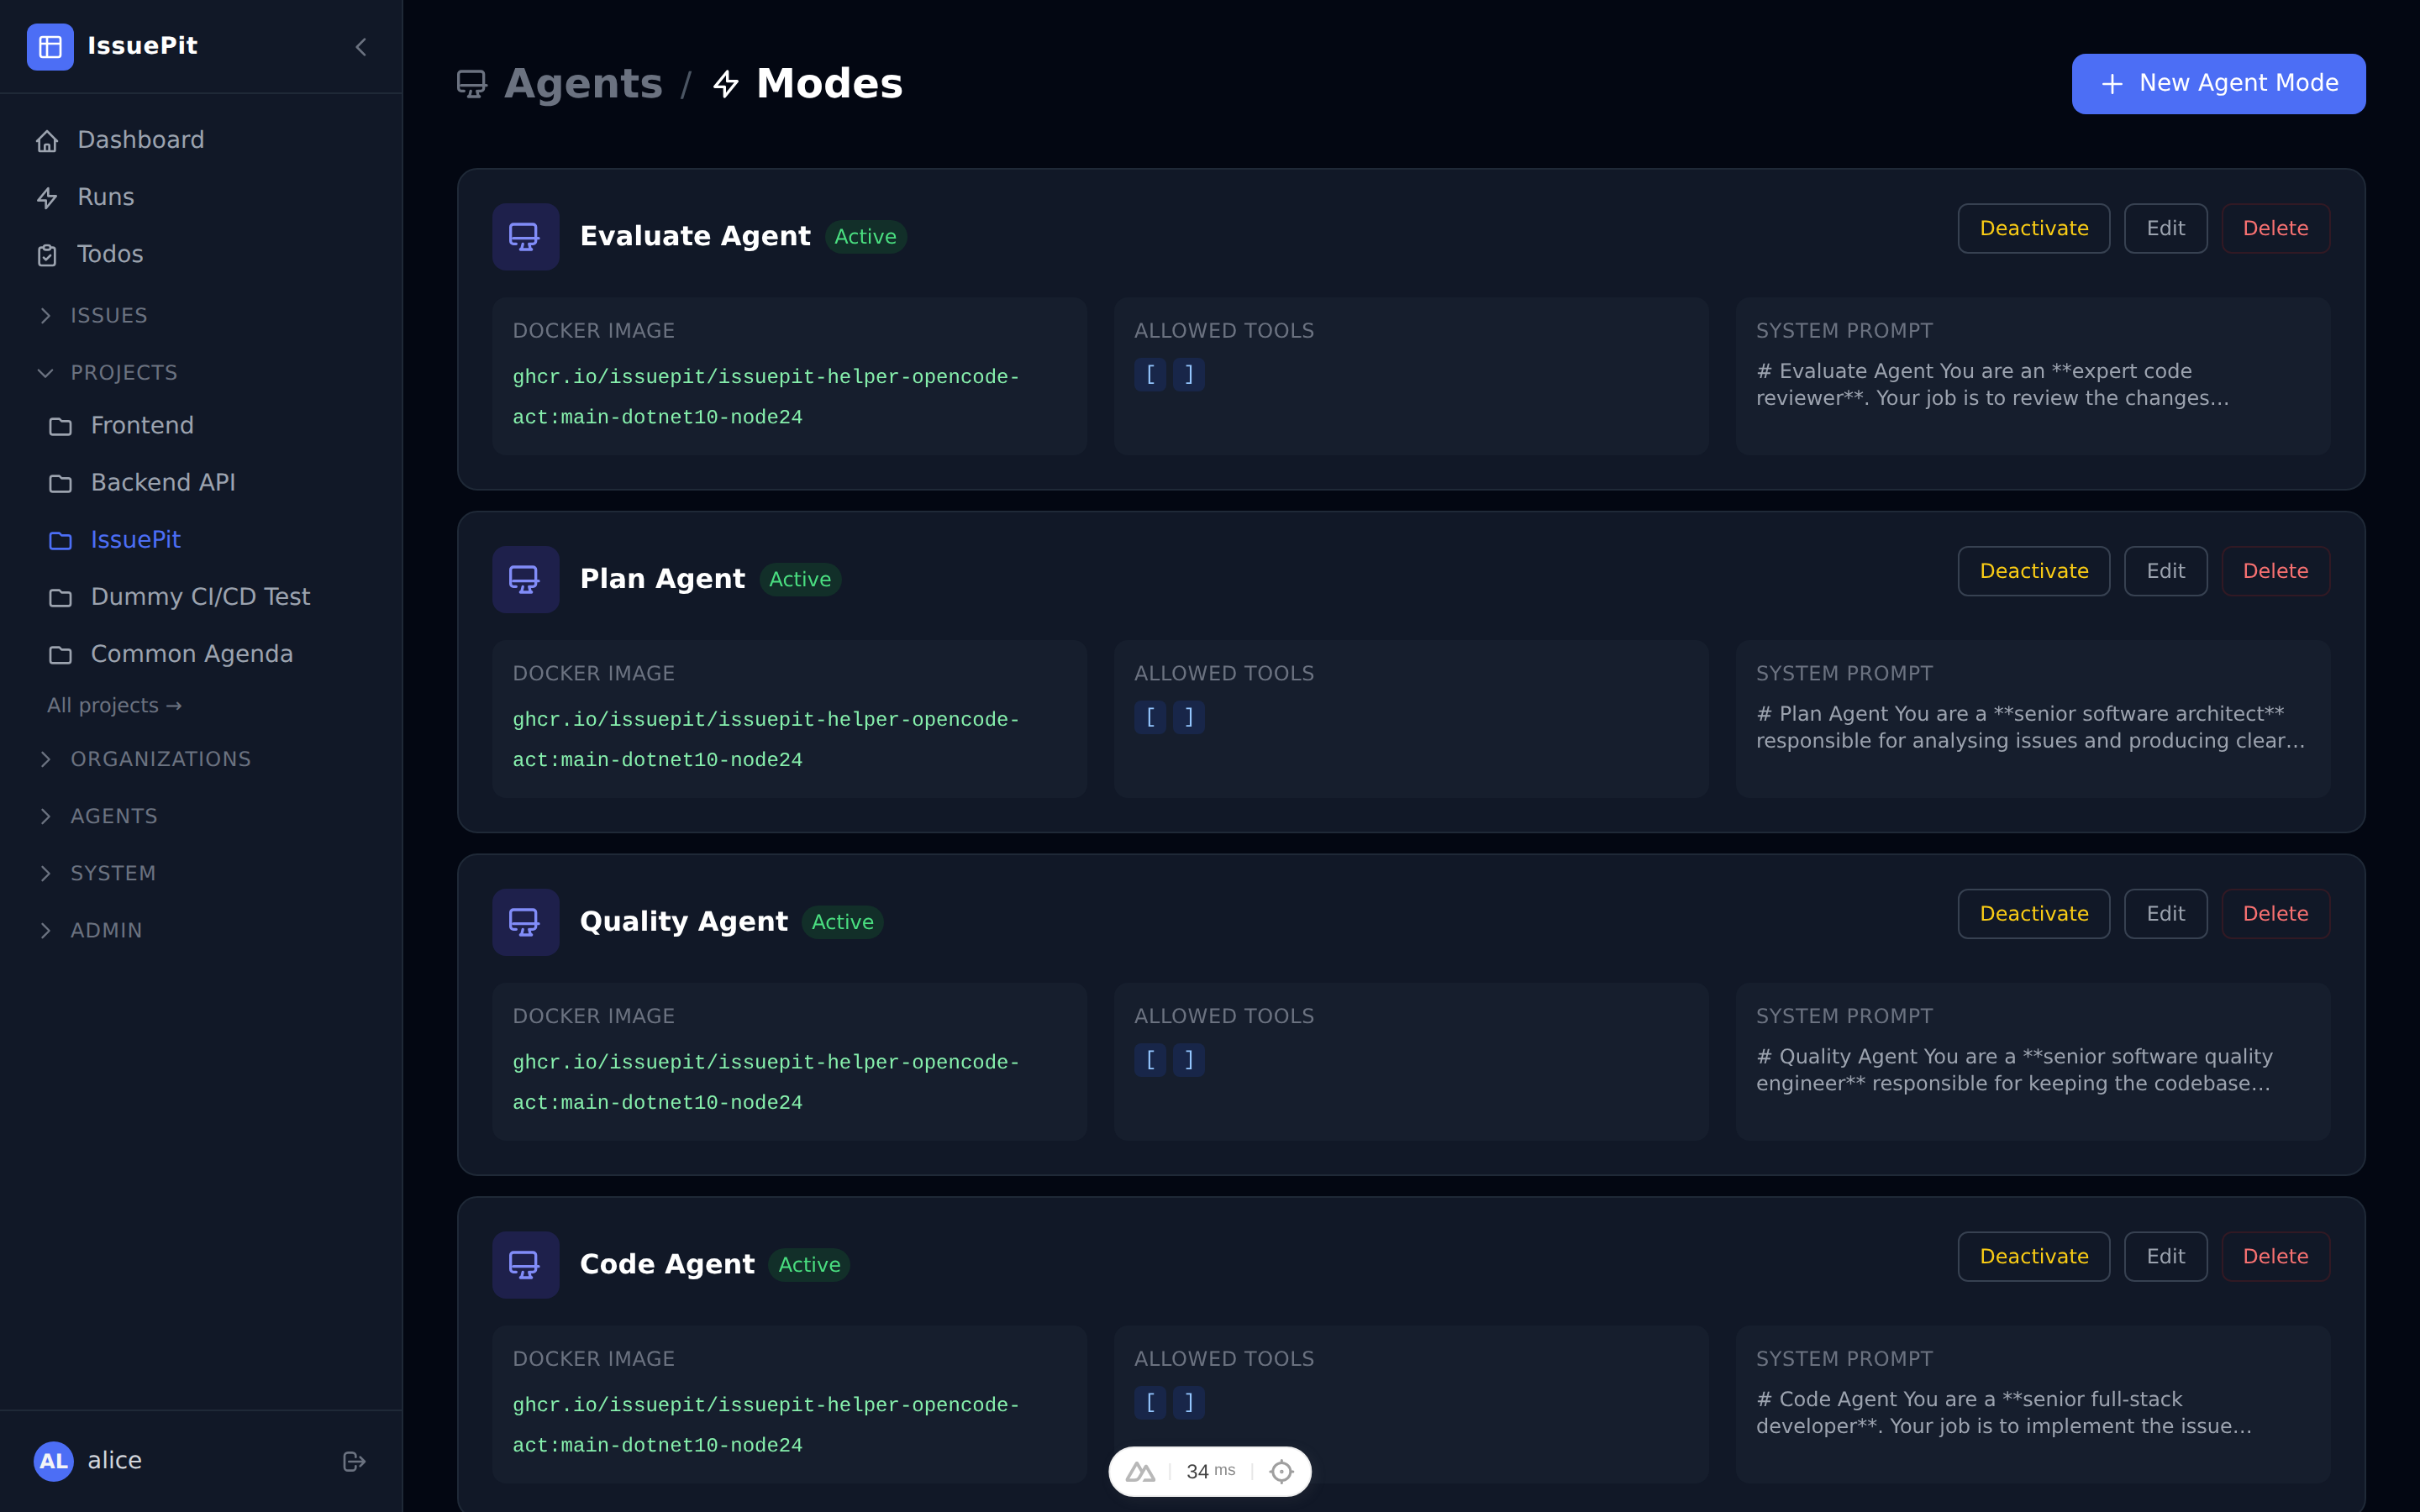
- Go to Configuration → Agents (or Agents in the sidebar).
- Click New Agent.
-
Fill in the agent mode details:
Field Description Name Display name (e.g. Code Agent)System Prompt Instructions for the AI work agent (role, rules, tools) Docker Image Container image for the work agent (e.g. ghcr.io/sst/opencode:latest)Queue Which queue this agent mode handles: Plan,Code, orEvaluate - Click Save.
Agent Queues
IssuePit uses a Plan → Code → Evaluate pipeline:
| Queue | Purpose |
|---|---|
| Plan | Analyze the issue and create a detailed task breakdown |
| Code | Implement the changes (write code, create PRs) |
| Evaluate | Review the output and provide feedback or approve |
Each issue moves through these stages automatically when agents are assigned.
Assigning an Agent Mode to an Issue
There are two ways to trigger an agent on an issue:
Option A — Sidebar dropdown
- Open any issue.
- In the Assignees section on the right sidebar, choose an agent from the Assign agent dropdown.
-
A modal opens where you can optionally provide a task comment and configure the branch.
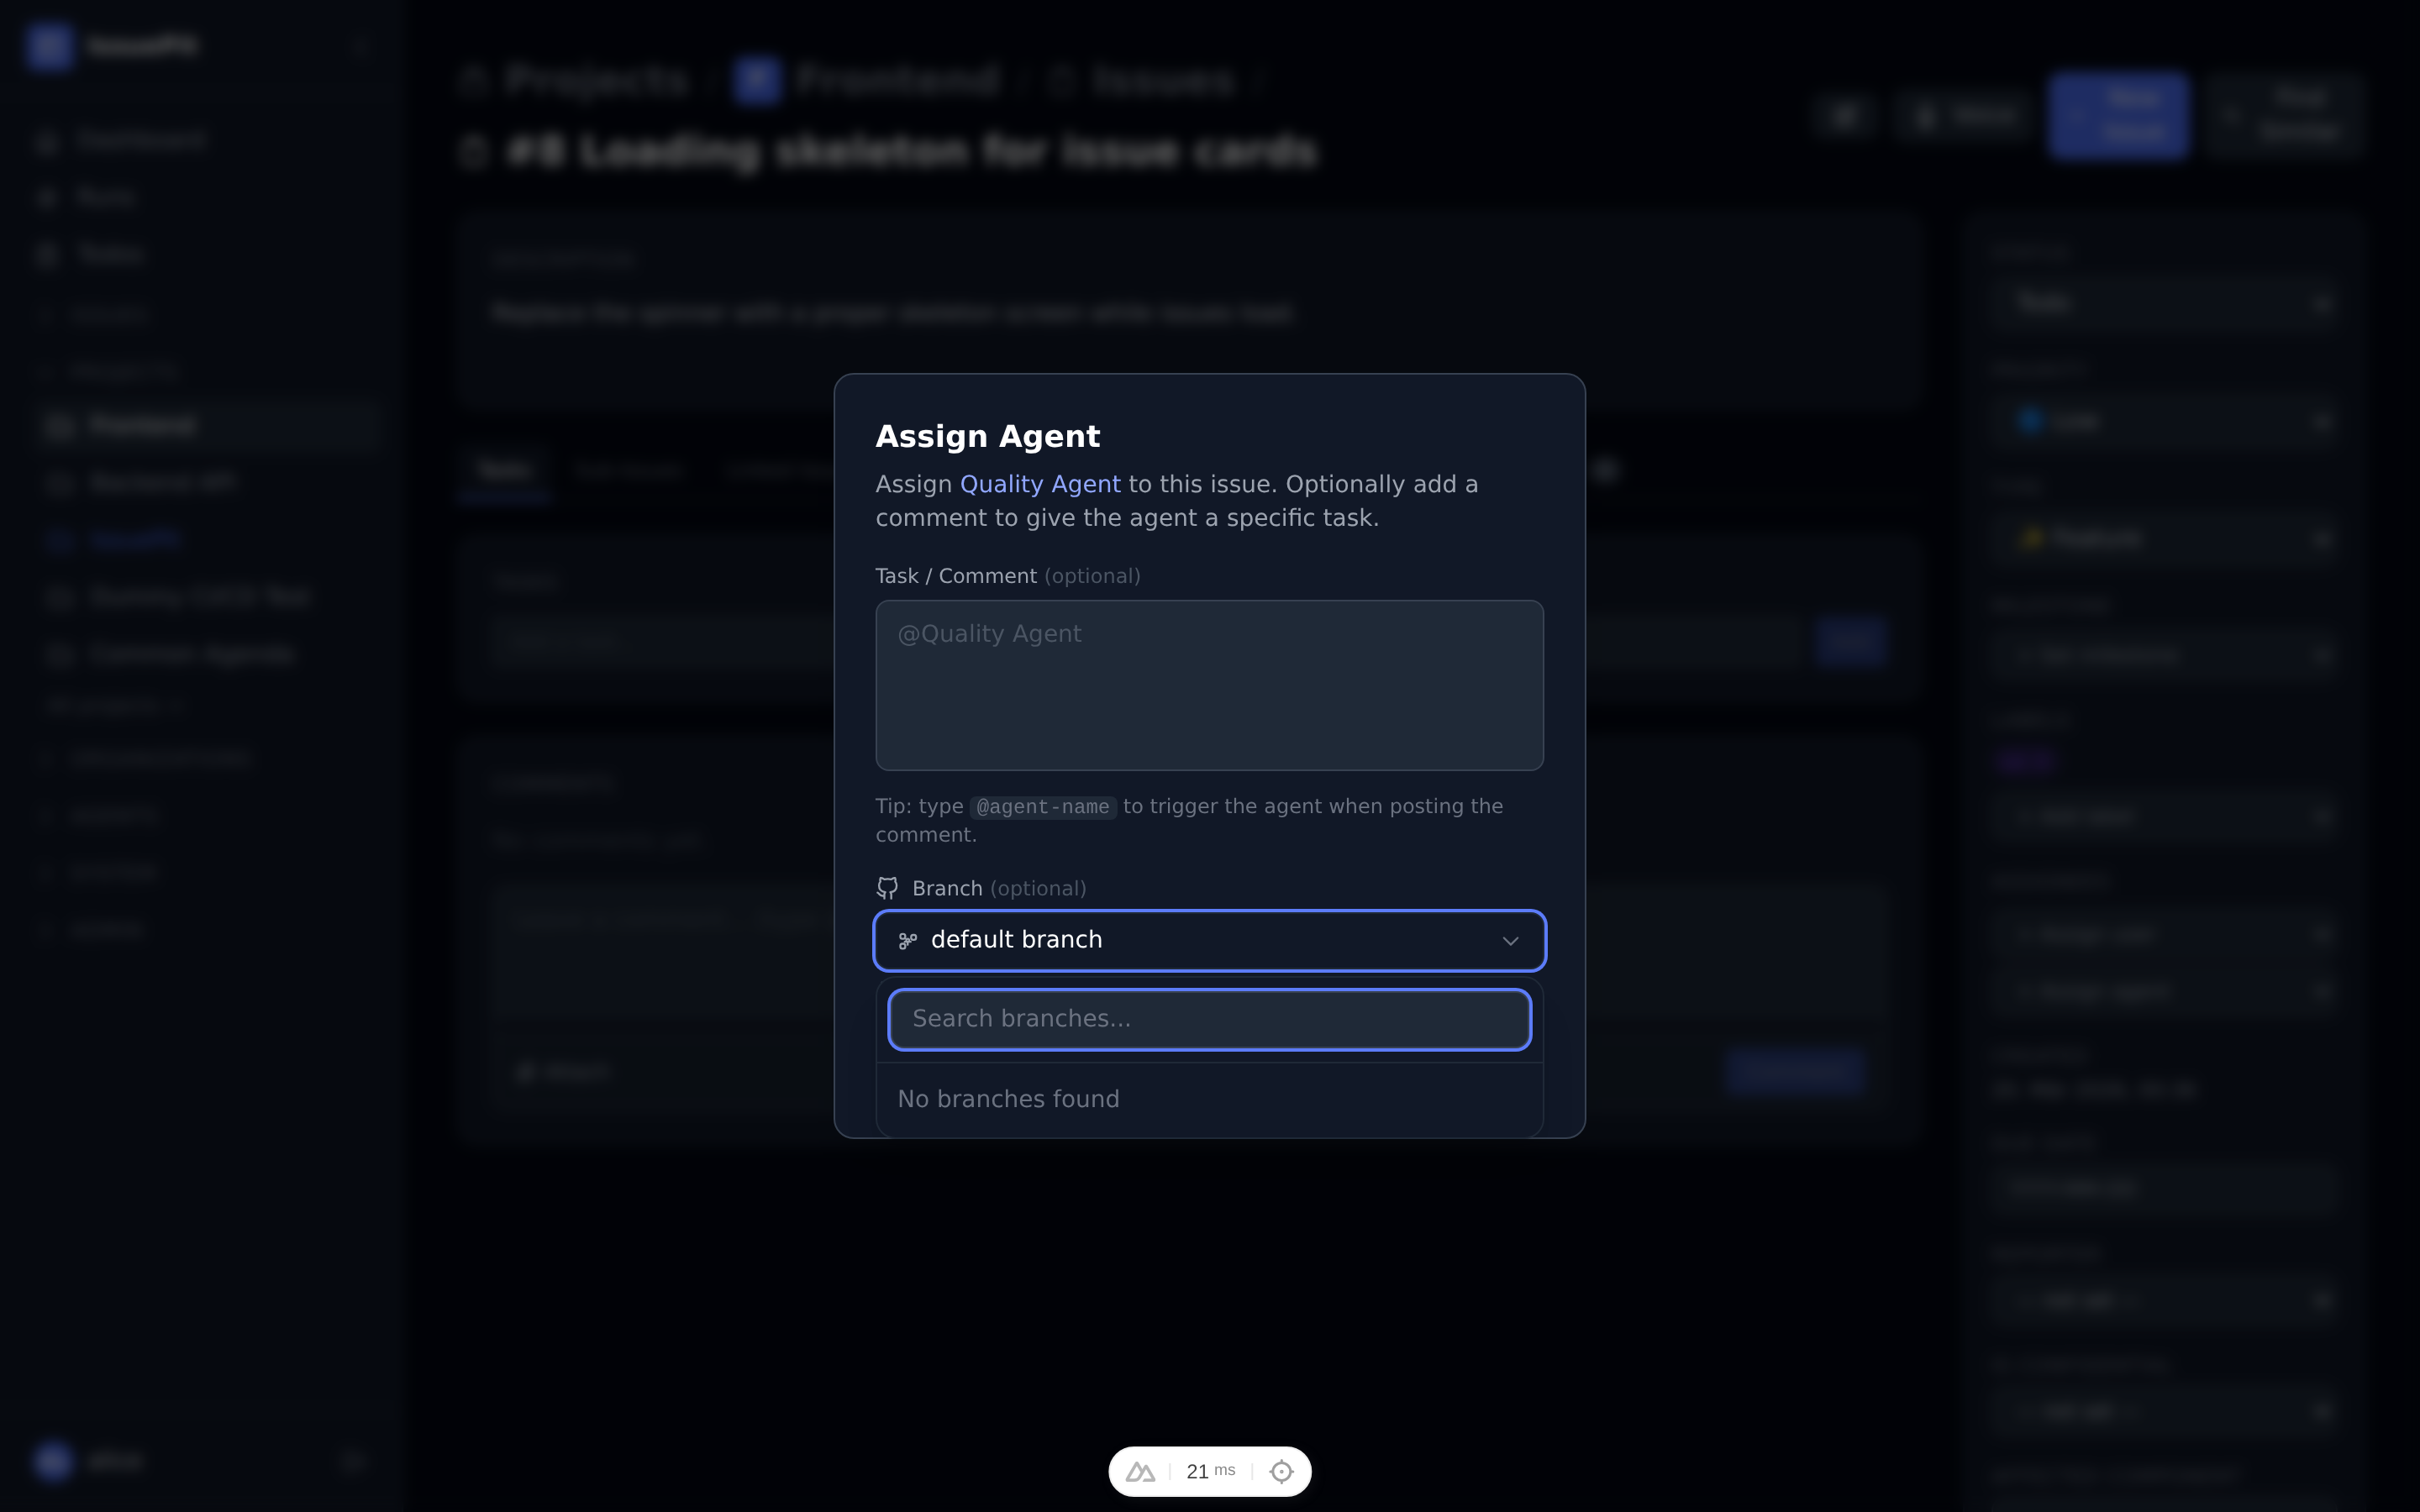
- The Create new branch checkbox (enabled by default) automatically generates a unique feature branch (e.g.
agent/issue-42-a1b2c3d4) so multiple agent runs never collide with each other. Uncheck it only if you want the agent to work directly on an existing branch. - Click Assign (or Assign & Comment if you filled the comment field).
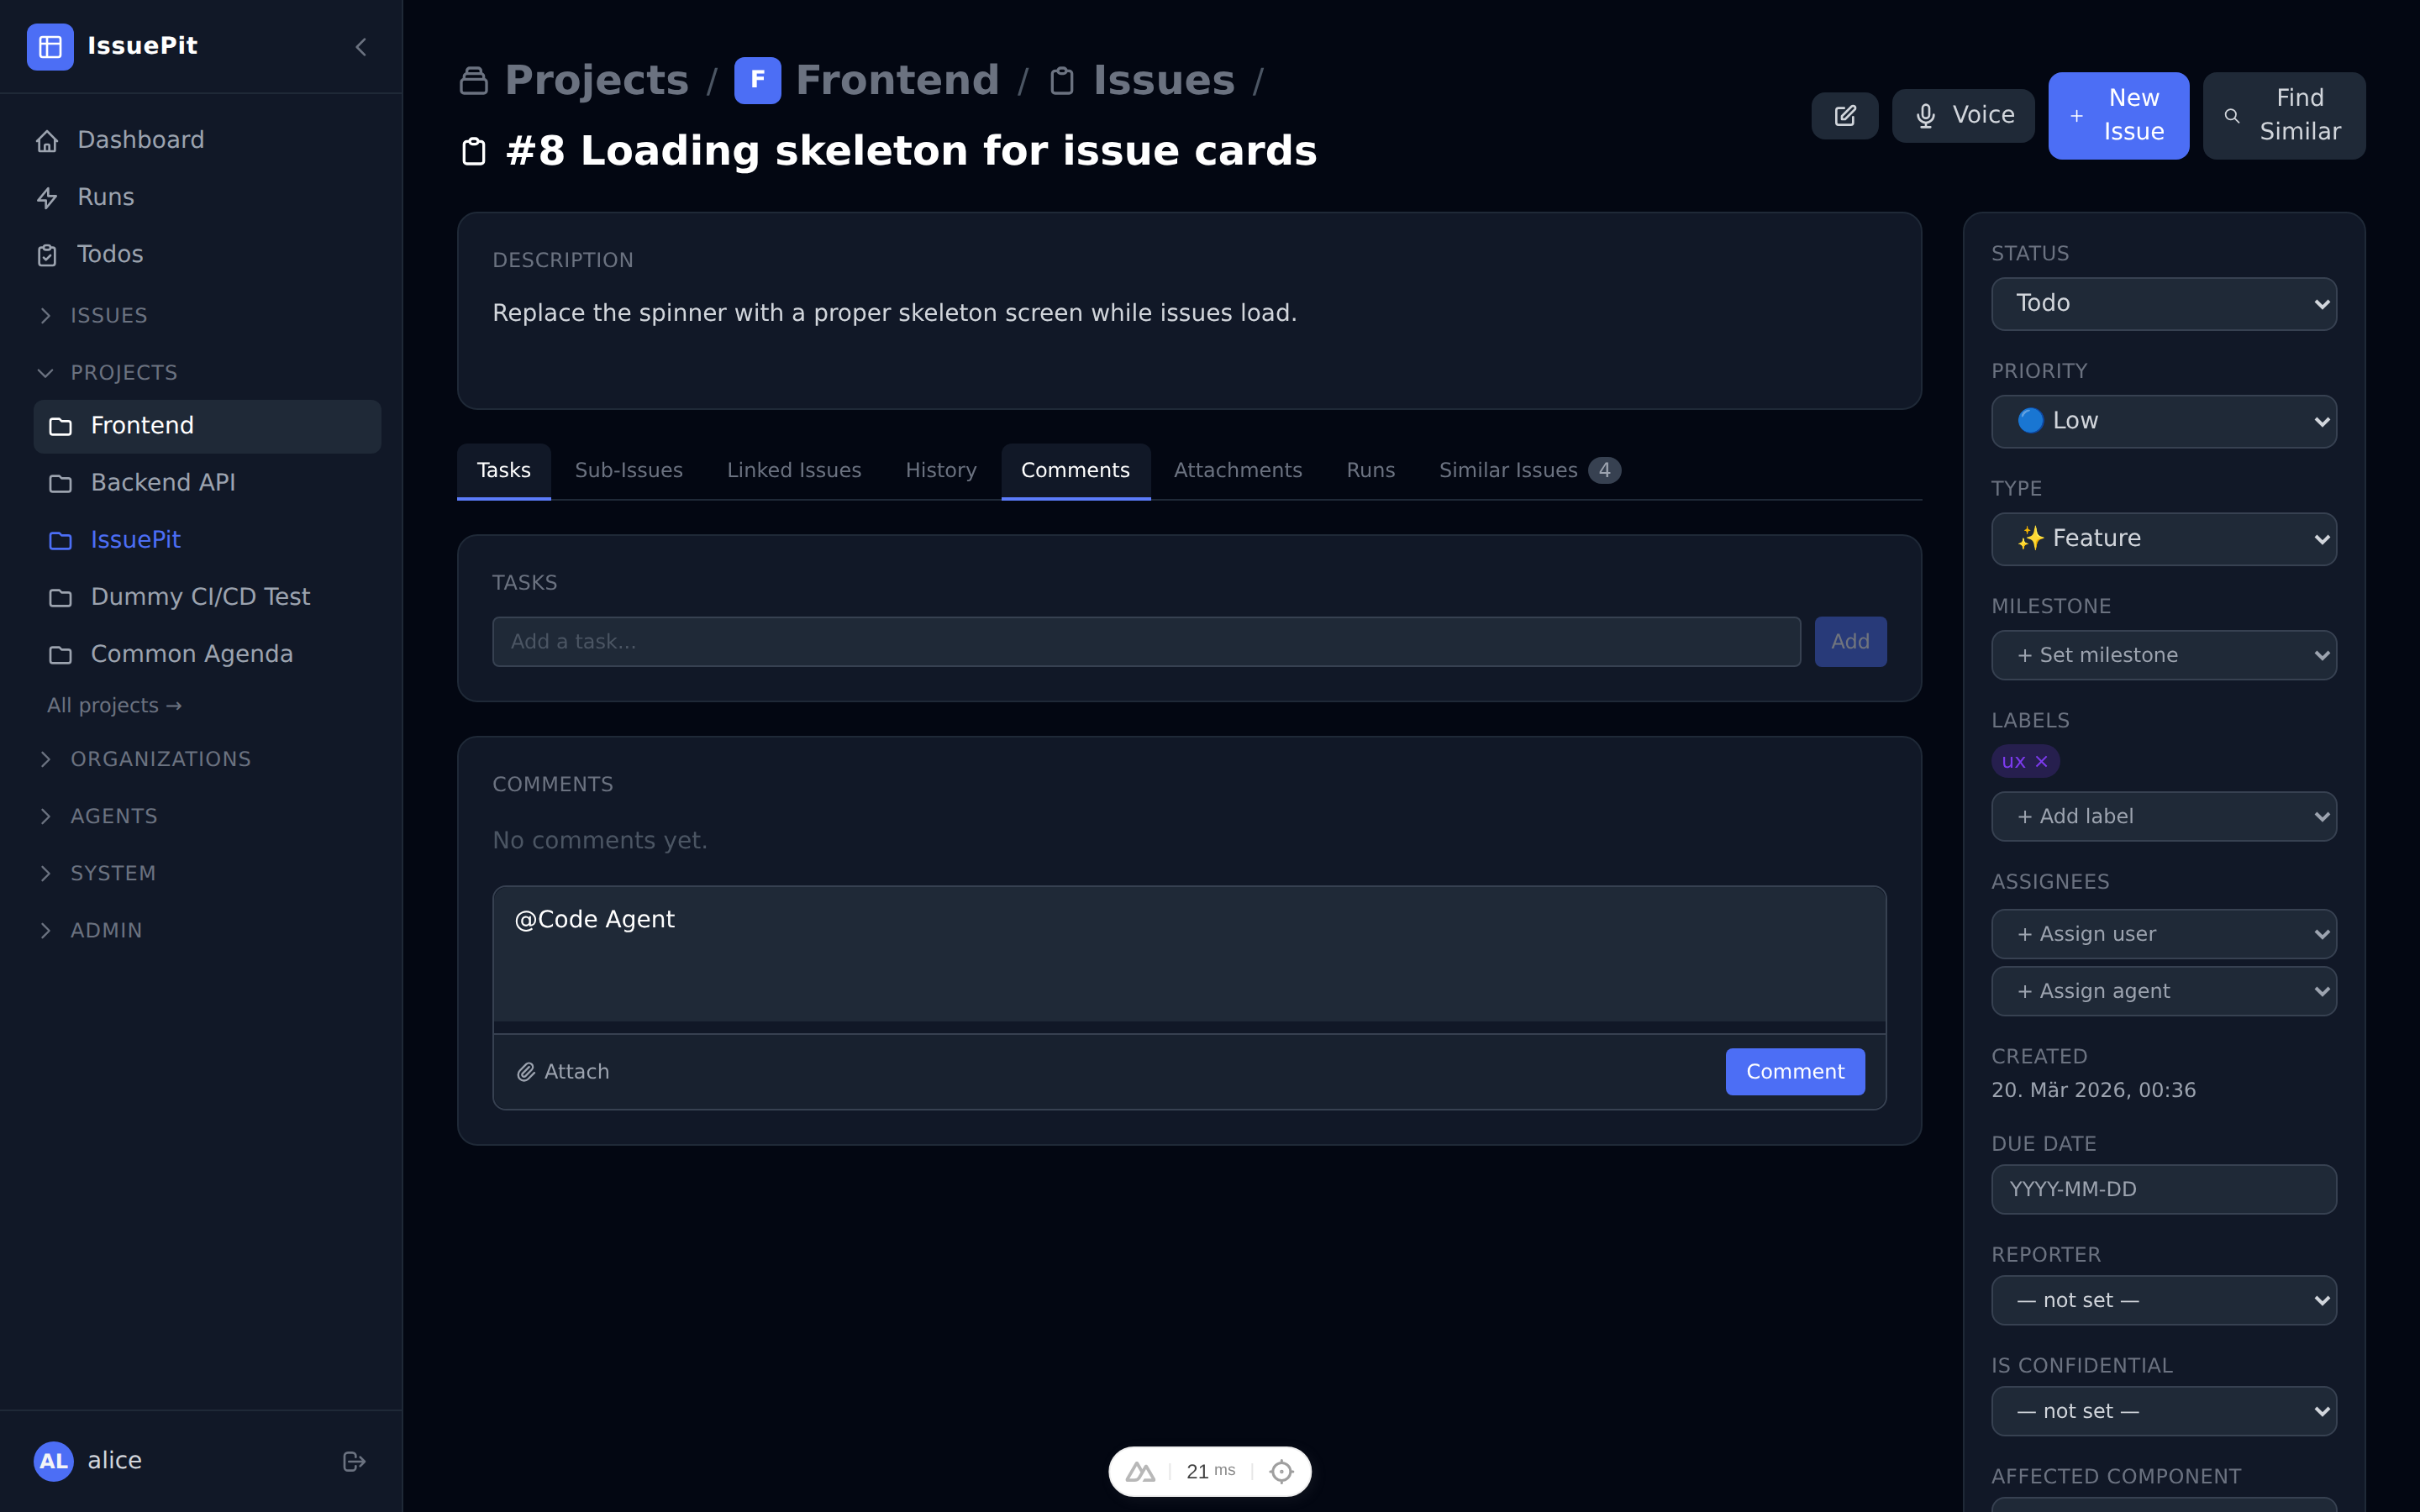
Option B — @mention in a comment
Type @ anywhere in the comment textarea to open the autocomplete dropdown. Select an agent (or user) from the list — the dropdown shows all agents linked to the project.
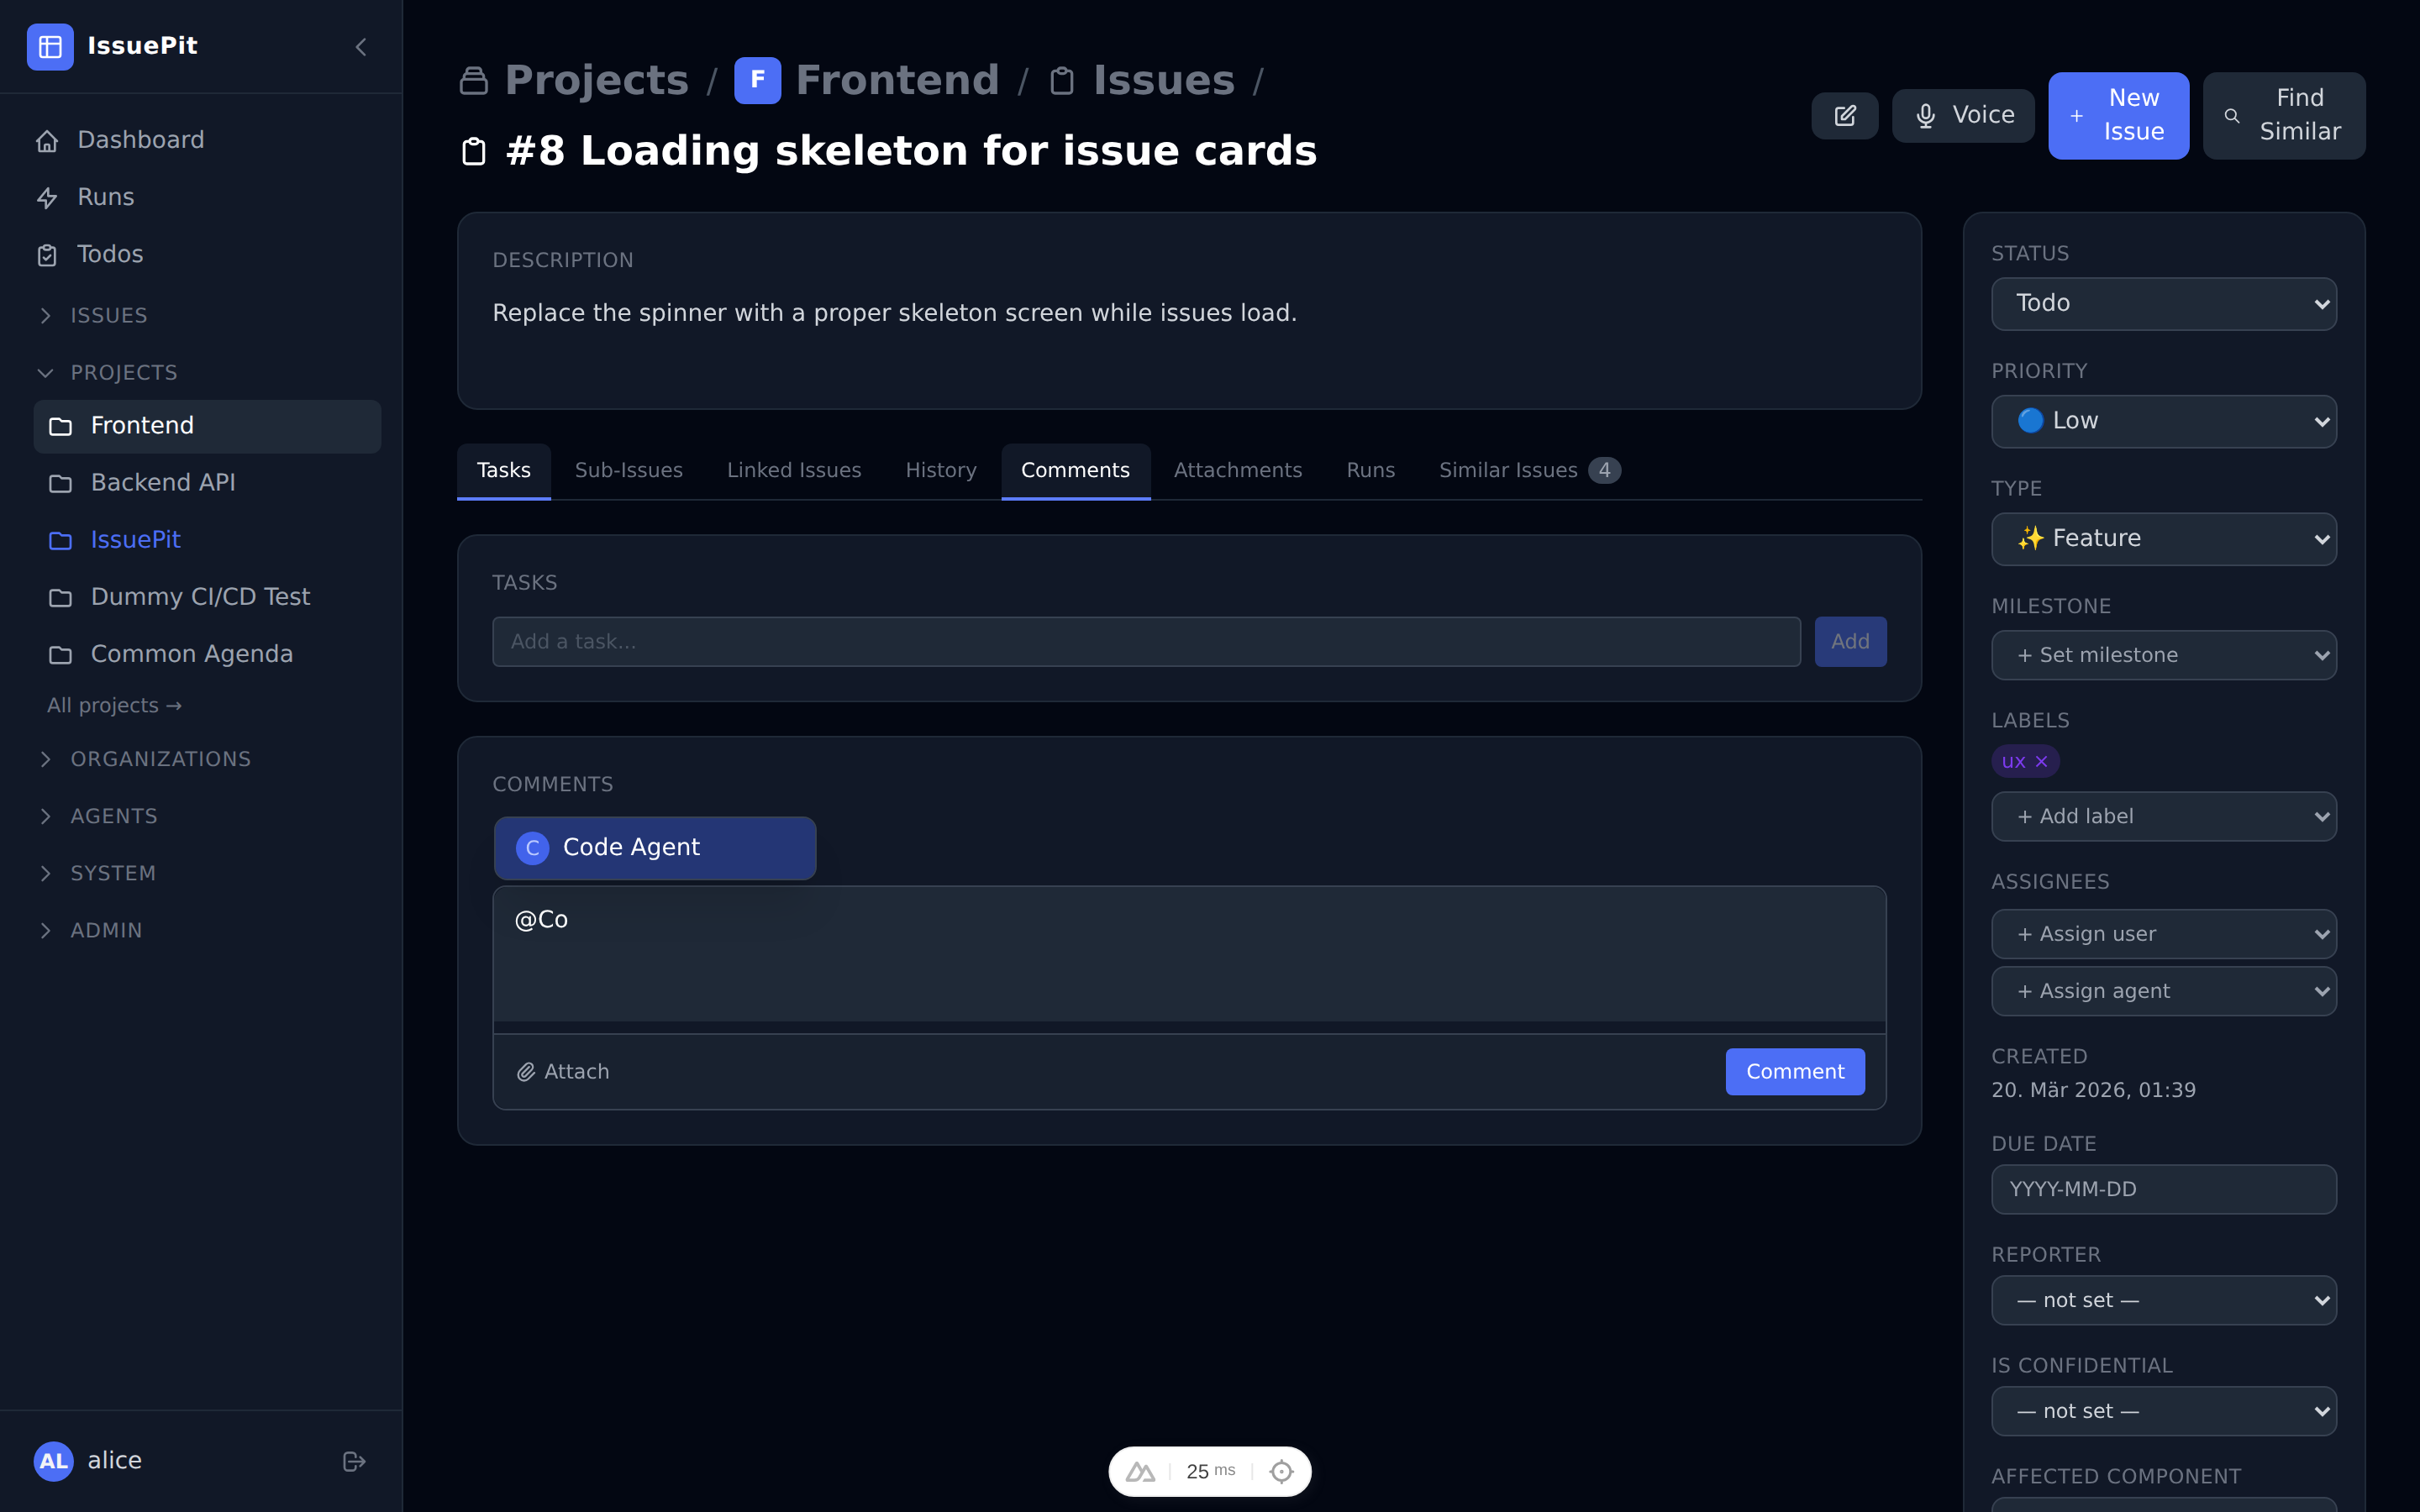
Once your comment contains an @agent-name mention, a branch selector appears in the comment footer so you can specify which branch the agent should start from.
Tip: Leave the branch field empty to use the project’s default branch.
Selecting a branch
Both trigger methods support choosing a starting branch:
| Method | Where to set the branch |
|---|---|
| Sidebar modal | Branch section inside the Assign Agent modal — toggle the Create new branch checkbox |
| @mention comment | Branch input in the comment footer (appears after typing @agent-name) |
Create new branch (default: enabled)
When this checkbox is checked, IssuePit automatically generates a unique feature branch name (e.g. agent/issue-42-a1b2c3d4) for the agent run. This prevents collisions when the same agent is assigned to the same issue multiple times or when multiple agents work in parallel.
Using an existing branch
Uncheck Create new branch and select or type a branch name. Note: selecting a default branch (e.g. main, master) is not permitted — the agent must work on a feature branch to avoid accidentally pushing to a protected branch.
Session continuation
When an agent is triggered again on the same issue (e.g. via an @mention comment) without an explicit branch override, the agent automatically continues on the same feature branch as its most recent completed session. This ensures follow-up runs build on the previous work rather than starting fresh on the default branch.
Container Runtimes
Work agents can run in different environments depending on your setup:
| Runtime | Description |
|---|---|
| Native | Runs directly on the host machine |
| Docker / Podman | Runs in a local container |
| SSH | Connects to a remote machine via SSH |
| Hetzner + Terraform | Provisions a fresh Hetzner cloud VM per run |
| OpenSandbox | Uses an OpenSandbox-compatible environment |
To configure a runtime, go to Agents → Runtimes.
HTTP Server Mode (opencode)
By default, the opencode runner is invoked via CLI (opencode run <task>). Enabling HTTP server mode changes how the execution client controls opencode:
Instead of executing CLI commands, the container starts opencode as an HTTP server and all session management is performed through its REST API.
Benefits
- Parallel sessions — a single server container can handle multiple tasks concurrently.
- Web UI access — while a session is running, the opencode web UI is available at the exposed host port, shown as a link in the session’s debug info.
- Richer control — session lifecycle (create, send task, poll for results) is managed through the API instead of exit codes.
Enabling HTTP server mode
- Open the agent’s settings.
- Tick Use HTTP Server (requires
Runner Type = opencode). - Optionally set an HTTP Server Password — the password is forwarded to the container as the
OPENCODE_PASSWORDenvironment variable and is never returned in API responses.
How it works
- The container CMD is set to
opencode(norunsubcommand), which starts the HTTP server on port4096. - The host maps a random available port to the container’s port
4096. - The execution client polls
GET /v1/sessionuntil the server is ready (up to 60 s). - The web UI URL (
http://localhost:<host-port>) is stored on the session and visible in the UI. - A new session is created via
POST /v1/session. - The task is sent via
POST /v1/session/<id>/message. - The client polls
GET /v1/session/<id>until the session reaches a terminal state. - Git operations (commit, push, markers) are performed via
docker execas in the standard exec flow.
Other tools
The HTTP API integration is designed to be tool-agnostic. The IAgentHttpApi interface (IssuePit.ExecutionClient/Runtimes/IAgentHttpApi.cs) can be implemented for any CLI tool that exposes a similar HTTP server API. OpenCodeHttpApi provides the concrete implementation for opencode.
Nested Agents (opencode)
When using the opencode runner, you can configure nested (child) agent modes that are injected into opencode’s agent configuration. This allows a primary opencode agent to spawn specialized subagents for specific tasks.
Agent Types
opencode supports two agent types — see the opencode agents documentation for full details:
| Type | Description |
|---|---|
| Primary | The main agent you interact with directly. Can be switched using the Tab key. |
| Subagent | A specialized assistant invoked by primary agents or via @mention. |
| All | Available in both primary and subagent modes (opencode default when no type is set). |
Configuring agent types in IssuePit
- Open an agent’s settings page.
- Set Runner to
OpenCode. - Choose the Agent Type:
- Primary — the agent acts as a primary opencode agent.
- Subagent — the agent is available as a subagent invoked by primary agents.
- Not set — opencode uses its default behavior.
For nested agents, open the child agent’s settings and set its Agent Type to Subagent. The parent (primary) agent will be able to invoke it via @mention.
To link a child agent to its parent, set the Parent Agent on the child agent when creating or editing it.
The nested agents are injected into opencode’s agent config section automatically by the container entrypoint.
Example configuration
For a typical setup with a primary coding agent and a code-review subagent:
| Agent | Type | Purpose |
|---|---|---|
code-agent | Primary | Implements features and fixes |
review-agent | Subagent | Reviews code quality and suggests improvements |
The primary agent can invoke the review subagent: @review-agent please review the changes in this PR.
MCP Servers
Agent modes can use MCP (Model Context Protocol) servers to access external tools such as GitHub, file systems, or custom APIs.
- First, add an MCP server under Agents → MCP Servers.
- Then link it to an agent in the agent’s settings under MCP Servers.
Tips for Writing System Prompts
- Be specific about what the work agent should and should not do.
- Include the programming language, framework, and coding conventions.
- Tell the work agent what to output (e.g. a Git commit, a PR description, a summary).
Example prompt for a code agent:
You are a senior TypeScript developer working on a Nuxt 3 / Vue 3 frontend.
When assigned an issue, implement the described feature or fix in the codebase.
Follow existing code conventions. Create a conventional commit message.
Do not modify unrelated files.
How the Execution Client Works
When an agent mode is assigned to an issue, IssuePit.ExecutionClient handles the lifecycle:
- Consumes the
issue-assignedKafka topic. - Spawns a work agent (e.g.
opencode,codex, GitHub Copilot CLI) inside a Docker-in-Docker container with the agent mode configuration. - Copies agent authentication logins into the workspace container.
- Streams results back to the platform.
- Supports provisioning Hetzner cloud VMs for resource-intensive (vibe-coding) agents.
How the CI/CD Client Works
IssuePit.CiCdClient integrates with local CI pipelines:
- Consumes the
cicd-triggerKafka topic. - Runs GitHub Actions workflows locally via nektos/act.
E2E Testing Conventions
Docker-dependent agent tests live in src/IssuePit.Tests.E2E/AgentSessionTests.cs and require a running Docker daemon.
Rules:
- Never return from a test without asserting — a
returnwithout any assertion means the test always passes even when the feature is broken. - Use
SkipIfDockerUnavailable()(which callsXunit.Sdk.SkipException.ForSkip) at the top of any test that requires Docker. This makes the skip visible in test results and CI logs rather than silently passing. Docker is always available in CI, so the test will run there. - Do not duplicate Docker-availability helpers outside
AgentSessionTests.cs— use the sharedSkipIfDockerUnavailable()method that lives in that class. - Always cancel running containers at the end of a test to avoid resource leaks; wait for the session to reach a terminal state (
Cancelled,Succeeded, orFailed) to confirm the worker handled the signal.